
Step 1 – Create your project
- 1. Go to Google Maps Platform

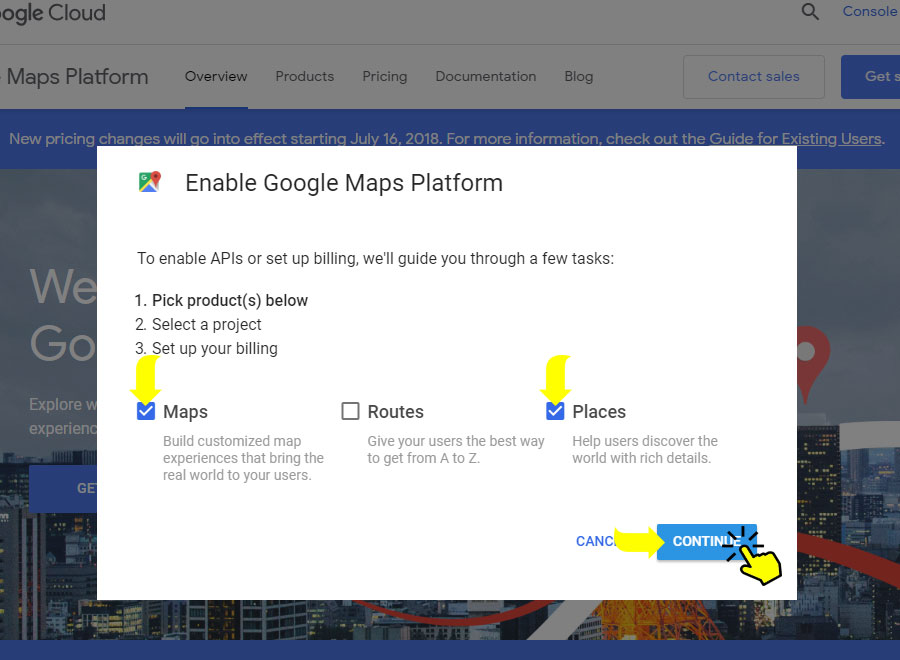
- Press the ‘Get Started’ button. In the window that opens, tick both ‘Maps’ and ‘Places’. Press Continue. At this stage, you will be asked to create a Google account or login to your existing one.
3. In the updated window, choose ‘Select a project’ and enter project name (e.g. Your Project name) in the box below. Then click Next.

Step 2 – Create a billing account
- In the updated window, click Create Billing Account.

2. Create a name for your billing project and press Continue. Fill in the form with your contact data and payment information. Click Next.
Step 3 – Get your API key and connect it to your project.
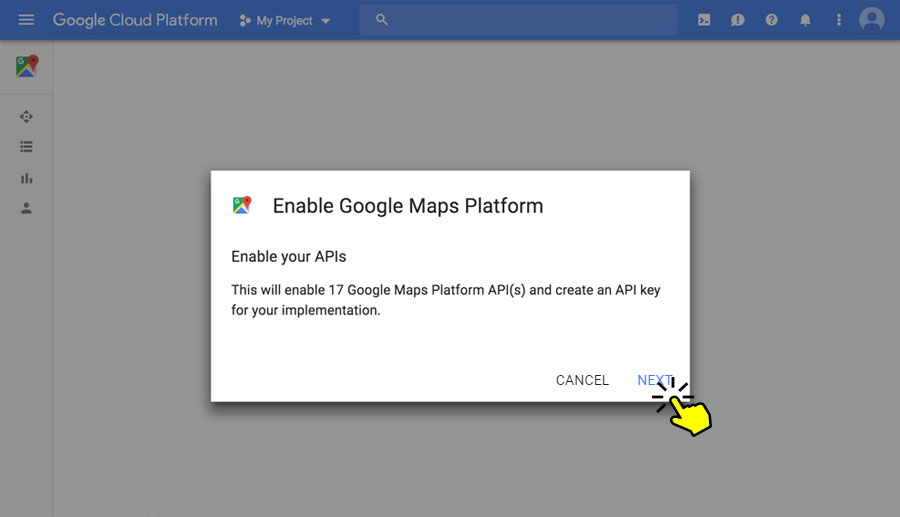
1. After clicking Next in Step 2, will be offered to enable your APIs. Press Next.
2.Basically “Maps” needs following libraries “Places API“, “Directions API“, “Maps Javascrip API“, “Geocoding API“, “Maps Static API“. If you are using Mobile app you need “Places SDK for Android”
3.To add Libraries to your project Click on “ENABLE APIS AND SERVICES” and search for your library
4.Once all libraries are enabled you can Click on the “Credentials” link
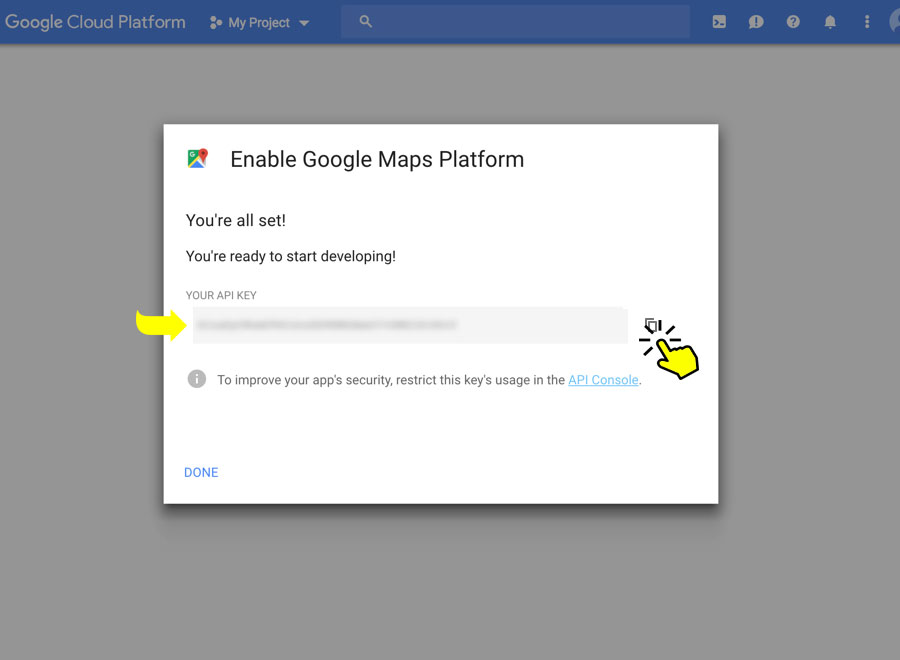
5. You will see a new window with your API key in the box. Save the key to be able to use it and press Done.
Update that Api key on our maps settings page.